This post is a combination of two previous posts. I love the flavor of the cookies in
Favorite Sugar Cookie *Dough*, but prefer the techniques for baking them in
Favorite Sugar Cookies. Now I won't have to flip back and forth, and I can direct friends to one place.
There is some minor spreading with this recipe, so if shape is more important that taste, stick with
Favorite Sugar Cookies, which has virtually no changes when baking. See the Santa Moons in Tip 5 at the bottom of this post to see a detailed cookie shape.
This recipe makes about about 24 cookies which is not a lot. You may want to double it.
Warning: the techniques that help the cookies keep their shape can take a lot of time, but the results are worth it. Today I made a double batch of rose cookies on sticks. Starting the clock after all my ingredients were measured, the last cookies came out of the oven 3 1/2 hours later.
Ingredients (single batch):
2 sticks salted butter, softened
3 oz (85 g) creamed cheese
3/4 (170 g) cup sugar
1 teaspoon vanilla
1 egg
3 cups (375 g) all purpose flower
Ingredients (double batch):
4 sticks salted butter, softened
6 oz (170 g) creamed cheese
1 1/2 (340 g) cup sugar
2 teaspoon vanilla
2 egg
6 cups (750 g) all purpose flower
Important Note: For best results, use a small kitchen scale to weigh your ingredients.
Equipment:
Cutting board (2 if doubling recipe)
Stand mixer
Parchment paper
Cookie sheets
Rolling pin
2-1/4" square dowels
1) Gather and measure your ingredients. Also make enough room in your fridge for the board, and in the freezer for a fairly level cookie sheet. Note the board that will be used to move the dough from fridge to counter top. If you're doubling this recipe, you will need two. They can be cutting boards or cookie sheets that you won't need for baking. Also note the 1/4 inch square dowels. These are really important. They are available at craft stores and are the secret to getting an even thickness.
2) Mix butter and creamed cheese on medium speed for 2-3 minutes or until blended. Scrape the bowl.
3) Add the sugar. Blend on medium for a full 5 minutes to make it light and fluffy like in this picture. Then mix in the vanilla. Add the egg and mix on low. When the egg is mixed in, add the flour about 1 cup at a time on low. Over mixing the dough will make it tough.
4) Turn the dough out on to the counter top for a final mix by hand. Put some flour on your hands if you need to. It will be sticky. You can use a bench scraper if you have one.
5) If you are doubling the recipe, divide the dough in half and work with one half at a time. Slightly dampen your counter top then put down a piece of parchment. This will prevent the parchment from sliding. Pat down the dough into a rectangular shape on the parchment. Make it almost as wide as the parchment. Lay the square dowels on each side. Cover with another sheet of parchment.
6) Roll the dough with your rolling pin until it is flush with the dowels. Try to get it as close to a rectangle as possible.
7) Slide the dough, still between the parchment sheets, onto one of your boards and put it in the fridge for a minimum of an hour. If you have doubled the recipe, roll out and refrigerate the other half of the dough. Time to clean up the mess in your kitchen. You're going to need that stand mixer bowl for making
Royal Icing.
8) Remove the dough from the fridge and slide it off the board onto the counter top. Loosen the bottom parchment paper by flipping the whole thing upside-down and peeling off what was the bottom paper. Now put it back and flip the whole thing right side up. Then remove the top piece of parchment paper to begin cutting your cookies. Try to place them at least an inch apart on a parchment lined cookie tray. (Don't worry if their not placed exactly right. They can be moved easily after being in the freezer.)
9) If you want to make cookies on sticks, like these balloons, lay them on the cookie sheet like this so that you can fit several on one tray. Inserting sticks can be tricky. The dough must be cold enough so that they keep their shape while you handle them. Put the dough between your finger and thumb as you slide the stick in about 1 - 1 1/2 inches.
10) Place the cookie tray in freezer for 15 minutes. Preheat your oven to 375° F during this time.
11) After 15 minutes in the freezer, put them directly in the oven and bake for 9-11 minutes, or until edges are just starting to turn golden brown. (If you need to adjust placement on the tray, do it between the freezer and the oven.) The more golden brown, the crisper the cookie. I have found most people like them less crisp so I take them out at the first sign of golden around the edges.
12) Let the cookies cool in the tray for 5 - 10 minutes. Then using a spatula gently place them on wire racks to finish cooling.
Miscellaneous Tips
Tip 1) It is important to only have one tray in the oven at a time. This slows down the process, especially when you are doubling the recipe, but you can always make a single recipe if you are short on time.
Tip 2) When you fill a tray with cookies and there is uncut dough left, just put it back in the fridge to keep it firm. When most of the dough has been cut, roll it out with the dowels again.
Tip 3) As the dough warms up to room temperature you will see rough edges and the dough doesn't pull away from the cutter cleanly. Smooth the edges with your finger, and use a corsage pin to clean up tight corners like in this picture. Then pop the dough back in the fridge until it is firm enough to cut cleanly.
Tip 4) Since you will be needing a timer for the oven and for the freezer, it is best to have two timers going. Sometimes I can cut a set of cookies and pop them in the freezer while another tray is cooking. Then I only need one timer. I suggest keeping it simple and using two.
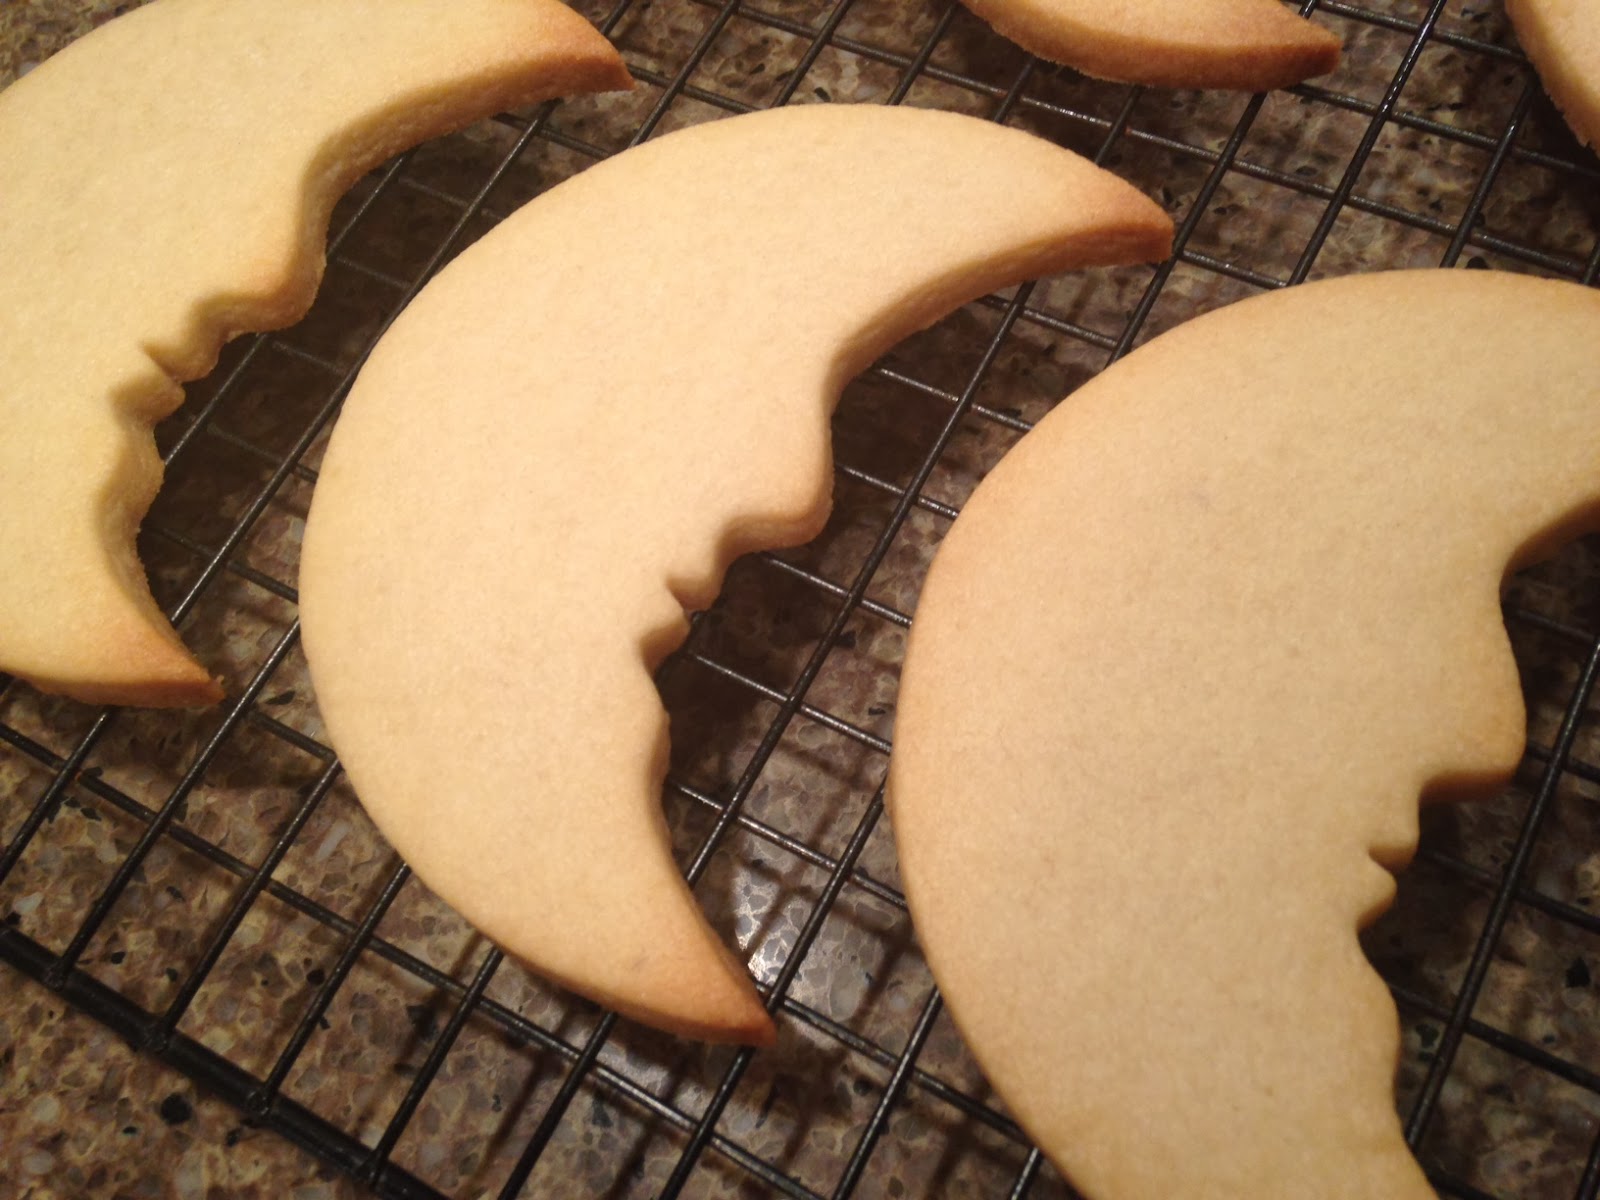
Tip 5) It may seem like a lot of work but this process gives you all the details from a nice cutter like on this moon cookie,
and help you avoid disasters like this teddy bear. This cookie was actually the inspiration that set me on the quest for the perfect sugar cookie recipe, and this is it.
Note: When I bake I'm always trying out new things. This time I made some 3D printer cookie cutters shaped like strawberries. See how to make your own cookie cutters in my post
here. After cutting out the shapes, I cut off what would be the bottom of the strawberry, turned them upside-down and suddenly I have a rose. These are great when baked with a lollipop stick.