Sunday, March 8, 2015

Hoa's and Michael's Chocolate Birthday Cake


I made this cake for my co-worker, Hoa.  It was easy to make and I know it will be delicious because I have used the cake and filling recipes in other cakes.  This is my second "naked cake" and I'm really starting to like them.  I'm going to show you how to make this cake in 3 posts.  First you should make the Chocolate Curls, which can be made several weeks in advance.  Then make the Whipped Chocolate Ganache filling, which can be made up to 4 days in advance.  Lastly make the cake and assemble as shown here. 

Ingredients:
2 cups (7 oz) cake flour
1 teaspoon baking soda
1/4 teaspoon salt
1/2 cup natural cocoa powder (not Dutch process)
1/2 cup lukewarm water
1/2 cup buttermilk at room temperature
1/2 cup cool water
2 teaspoons vanilla
2 eggs at room temperature
1 stick butter
1 cup (7 oz) sugar
1 cup (7 oz) light brown sugar

Equipment:
3-8" cake pans
Electric mixer with paddle attachment
Baking strips (optional)


1) Make your "mise en place" (everything in its place).


2) Put your rack in the lower 1/3 of the oven and turn it on to 350 degrees.


3) Prepare your pans by lining them with parchment.  Soak and apply baking strips if you wish.


4) Whisk together then sift onto parchment or wax paper, cake flour, baking soda, and salt.  In a small bowl, whisk together the cocoa and lukewarm water.  Set aside to thicken.  Combine buttermilk, remaining water, and vanilla.  In another small bowl, whisk together eggs.


5) Using the paddle attachment on your stand mixer, beat the butter a few seconds, then gradually add the sugars.  Beat 6-7 minutes until fluffy.


6) Slowly pour in the eggs and mix until fluffy and velvety.  Add the cocoa mixture and beat on medium just until combined.  It will want to separate at this point.


7) Divide the sifted ingredients into 4 parts. Set your mixer on low or mix the following by hand.  Mix in 1/4 of the sifted ingredients, then 1/3 of the buttermilk mixture.  Alternate adding dry and wet ingredients until done.  The last item you add will be the sifted ingredients.


8) This is how the batter will look when done.  Pour into cake pans.


9) Bake at 350 degrees for about 20 minutes or until it springs back when touched and a toothpick comes out clean.  Allow to cool 5-10 minutes before removing from pans.  Cool completely, right side up, on racks.  


10) Now it is time to whip the Whipped Chocolate Ganache that is in your refrigerator.  It should form soft peaks.  Be careful not to over whip it as it will be hard to spread without tearing up the cake.  Put 1 cup of ganache on top of each layer.


11) Decorate with your Chocolate Curls.


12) Wrap with plastic wrap and store in refrigerator.  Remove from refrigerator 30 minutes before serving.


Happy Birthday Michael!


Whipped Chocolate Ganache


This is the filling I like to use in chocolate cakes.  It's delicious, super easy to make, and can be stored in your refrigerator up to 4 days.

Ingredients:
2.5 high quality chocolate bars
2.5 cups heavy whipping cream
(Makes about 3 cups)

1) These are the chocolate bars I like best but you can use any type of chocolate.  60-72% cacao would be great if you like yours a little darker.


2) Chop the chocolate medium fine.  To save time, put this in the bowl of your stand mixer.


3) This is the whipping cream I use.


4) Bring it to a boil.


5) Pour it over the chopped chocolate but do not stir.


6)  It will look a little odd but don't stir for 1 full minute.


7) Now use a whisk to gently mix in the chocolate.  Let it stand for 15-20 minutes and stir again.  The chocolate should be completely melted and smooth.


8) Place some plastic wrap directly on the surface of the ganache.  Refrigerate for a minimum of 5-6 hours.  It can be prepared up to 4 days before needed.


9) Right before you are ready to use it, remove the plastic wrap and put the bowl on your stand mixer with the whisk attachment on medium speed until light and fluffy.  When done, it should form soft peaks.  Be careful not to over whip or it will be difficult to spread.

Chocolate Curls


These chocolate curls are used in my post called Hoa's Chocolate Birthday Cake.  They're easy to make, they last several months in a sealed container in the refrigerator, and they can be used to dress up a variety of desserts.  They are made in a similar way to the Chocolate Fans, so once you get the hang of these, try the fans.

Ingredients:
2 high quality chocolate bars, finely chopped  

I like Ghirardelli chocolate the best, and it's not just because I'm from the San Francisco Bay Area.  I've compared several chocolates side by side.  I find Hershey's to be gritty and a lot of the expensive chocolate bars, like Godiva, taste greasy.  Do some taste testing and use what you like best.  For this recipe I used 60% cacao and semisweet which is about 45% cacao, but you can use any cacao percentage or even white chocolate.  


Equipment:
1 cookie sheet (not non-stick).  If it has sides, use the bottom.
1 offset spatula
1 small metal bowl for melting the chocolate
Apron
Sharp metal spatula.  This can be a brownie spatula, like I use, or one end of a bench scraper.

1) These directions show me working with one chocolate bar at a time.  For a cake topping you will need to repeat the process with the second bar.  First chop one bar of chocolate into medium fine chunks and put it in a metal bowl.  Set it in a simmering open water bath.  Keep the flame on its lowest setting or even turn it off completely for white chocolate.


2) Warm the cookie sheet by moving it over your burner about 6 inches above the flame.  


3) Pour the melted chocolate on the cookie sheet.


4) Use the offset spatula to spread the chocolate out to cover the cookie sheet.  I was using my other hand to take the picture, but when I spread the chocolate out, the fingers of my left hand were pressing lightly on the blade of the spatula about half way up.


5) When it is fairly even, put the cookie sheet in the refrigerator for 25 minutes.  Longer is ok.


6) Take the cookie sheet out of the refrigerator and let it come up to temperature for about 2 minutes.  Using the spatula upside-down as shown below, scrape the chocolate from the cookie sheet into little curls.  The trick here is that the chocolate has to be at the right temperature.  If it sticks to your spatula, it's too warm.  Put the whole thing back in the refrigerator for 5 minutes.  When you bring it out again, allow less time for it to warm up.  On the other hand, if it crackles instead of curling, it's still too cold.  Wait a minute and try again.  Once the chocolate starts to roll up, work quickly to get as much of it rolled up as you can.  Getting it to the right temperature is an iterative process, so be patient.


7) If you scrape on the diagonal you can get these beautiful little spiral curls.  Be sure to do a variety of sizes.  You don't want them all the same.


8) This is what mistakes look like.  They can be remelted and reused (or eaten).


9)  Place your curls in a sealed plastic container and put them in the refrigerator until ready to use.


10) Repeat with second chocolate bar.


Saturday, March 7, 2015

Old Projects Gallary


This is a collection of pictures from projects before I started my blog, or projects that didn't get their own post.  They're not really in any order.  Let me know if you would like more information on any of these projects.


This is a Queen of Sheba cake that I made from my Craftsy class, Decadent Chocolate Cakes by Alice Medrich.  I made a post about one of her other cakes here, and here.


I got this cutter at Kroger and made Valentines Day cookies for the Operations team at work. 


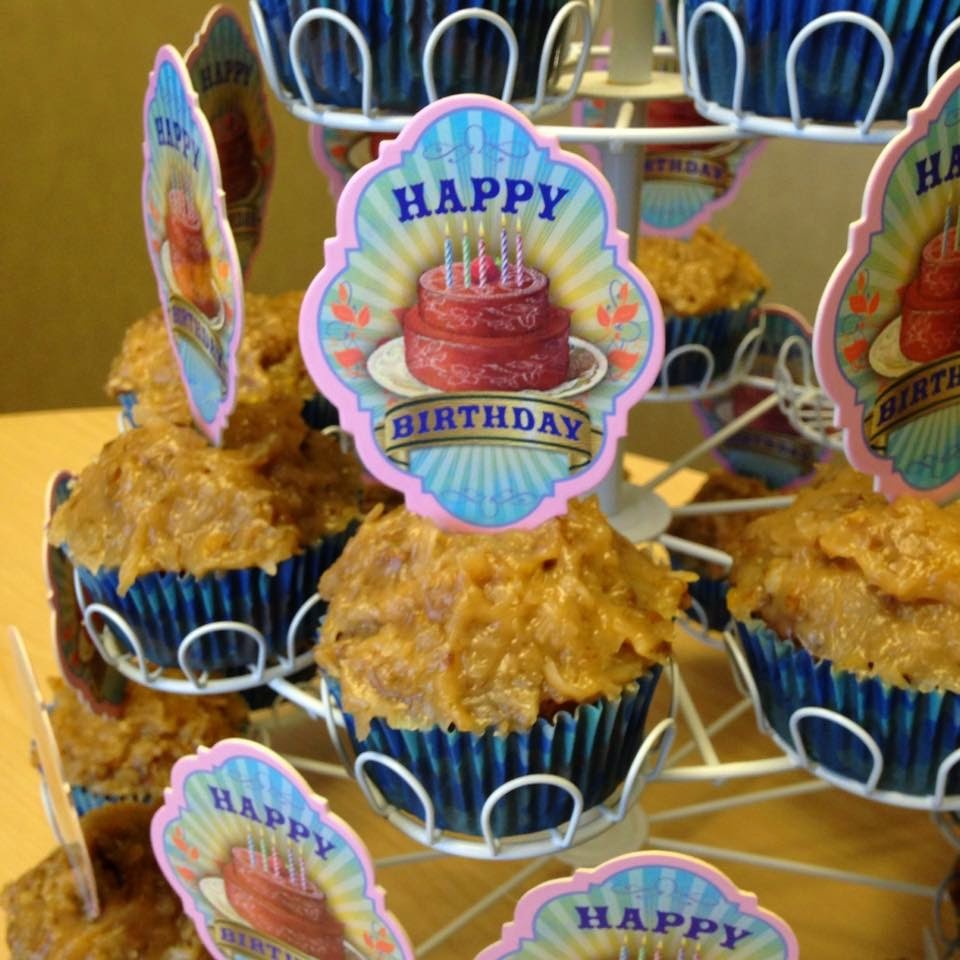
German Chocolate cupcakes for Eric at work.  The home made frosting recipe came from Julie and it's a keeper!


I had fun making this ginger bread house for Christmas pictures.  I love the Necco Wafer candy roof.


I copied these from a book.


These were made when I was enrolled in a Wilton cake decorating class.


This was Billy's Minecraft birthday cake.


Minions copied from pictures I saw on Facebook.


This poor cookie was made with store bought sugar cookie dough.


I got a new recipe for sugar cookies and started making football players with this teddy bear (minus the ears) cookie cutter.


 These cookies are from my first Wilton cake decorating class.  This was before they trusted us with cakes.


I saw a video on YouTube showing how to make butterfly sugar cookies.   I started reading about Color Flow and this was my first attempt at it.  I can drag a toothpick with the best of them!


This was the first cake I decorated in my Wilton cake decorating class.  Billy was really into Nyan Cat.


More techniques learned at my Wilton class.


I brought these to work for Halloween while I was in the Wilton class.


This was my final project in my first Wilton class.  It was hard but I learned a lot.  I was on to the second class in the series.


These two pictures are of a cake I made in my second Wilton class.  We had moved from butter cream to royal icing.  We weren't doing fondant in class yet but I read about it online and tried it here.


This was my final project for Wilton class number 2.  I wasn't very good at making roses so I figured if I had to make this many of them I'd be pretty good by the time I was done.  This was the cake on the cover of one of Wilton's cake decorating books.  I found the stencils for decorating the sides on E-Bay.


In Wilton class number 3 we learned how to make flowers out of fondant.  I was excited to learn how to do this but disenchanted with the results and the taste of it.


These are more flowers from Wilton class number 3.  It wasn't part of the class but I learned how to paint microwaved Candy Melts on mint leaves to make beautiful edible leaves.  You can see them on these cupcakes.


This cake was my final project from Wilton's third class.  The roses were made from gum paste.  The cake was covered with fondant.  Even the cake board was even covered in fondant.  


I made this cake for a co-worker's baby shower.  It's butter cream but it looks like fondant because I smoothed it with Viva paper towels.  They're the only paper towels with no pattern on them so it works well.


Since Wilton class number 4 didn't make, I was left to my own devices.  That's when I found Craftsy.  I watched the videos for Modern Butter Cream and this was my first cake.


I was on a terrible project at work where we all had to spend every day in a conference room.  People started bringing snacks so I make these.  The cupcakes are a Duncan Hines spice cake mix.  The frosting was from my Craftsy Modern Butter Cream class, and the flowers were from my second Wilton class, made of royal icing.


I need to write a post about these muffins.  I was on a quest to duplicate Starbucks's blueberry muffins.  They are awesome!


These pictures are from when I started discovering molds.  In the first picture, the cameo is real.  I made a mold from it with materials I ordered when I bought a new Craftsy class.  


Then I discovered First Impressions online and got the mold that resulted in the cameo on the left.  I used it to make the cookies below.


I bought a book called Cake Decorating at Home.  These cookies and cupcakes were featured in it.


 I don't know the name of this dessert, but it's yummy!  It has pound cake, marscapone, strawberries, raspberries, blueberries, and is finally drizzled with strawberry syrup.


Happy Birthday to Boss Man!


I bought a class on Craftsy by Jessica Harris.  It was called Clean and Simple Cake Decorating.  Shortly after that I found her blog and copied her cake.


I made these roses from Candy Melts, which are a big part of Jessica Harris's decorating technique.  I also learned how to do this on Jessica's blog.


This was Billy's birthday cake.  It has something to do with a video game.  Planet Side 2 maybe?


Another birthday cake for Billy.


CakeCentral.com had some articles about techniques that look like lace.  This was the only thing I have made that I think I actually cringed when people at work ate it.


These are orchids that I made after taking another Craftsy class.  It was called Exotic Sugar Orchids by James Rosselle.


Another Craftsy class: Classic Sugar Flowers by Nicholas Lodge.


Another Craftsy class: Southern Sugar Flowers by Maggie Austin


Last minute cupcakes for Boss Man on Boss's Day.


Day of the Dead cupcakes.  These were so fun to make!  The directions I followed were from My Cake School.


I fell in love with these Santa cookies and snow flakes by The Baking Sheet and just had to make my own.  I found the cutter at Not Just Cakes by Annie.  Santa was my first cookie cutter that was made on a 3D printer.  Soon I was making my own 3D printer cookie cutters.


Star Trek cookies made from the tutorial at The Sweet Adventures of Sugarbelle.


I found these cute lip molds at Hobby Lobby.  I put a couple of Candy Melts in each and microwave them a few seconds, then put them in the freezer a couple of minutes.


Sweet Sugarbelle has a great tutorial on how to make these Leprechaun cookies with an upside-down ice cream shaped cutter.


My friend Kelly and I made these cute onesie cooies for her friend's baby shower.


Here I was playing with putting cookies on sticks and doing royal icing transfers for the letters.  I will probably make the peeps again this Easter.  So easy and so cute!


And for my other friend/coworker Kelley, I made these shoe cookies since she is a little crazy about shoes.  I'm getting a shoe education from her.


I found this large bunny cutter at Cake Carousel in Richardson.  This was the first time I experimented with putting cookies in plastic bags with ribbons.  I found it works really well.  Our admin took the first one, then Boss Man and his co-boss snatched up the rest for their kids.  These are so simple to make.  The tails are made with the star tip.  Use a small (4mm) black sugar pearls for the eyes.  I used half a pink Wilton confetti heart for the noses.  Tip number 3 for the ribbon.  I need to make these again!


Valentines Day roses turned out nice on sticks and in plastic bags.  They were given to the operations team at work.


This is the cake I made for my own birthday this year.  It didn't come out as I had hoped.  I want a do-over.